

Wood Texture: A Step-by-Step Guide to Texturing Wood. When it comes to woodworking, one of the best ways to add character and uniqueness to a project is through wood texturing. Whether you’re creating rustic furniture, custom wood paneling, or decorative pieces, achieving a high-quality wood texture can significantly elevate the aesthetic appeal. One of the most efficient and innovative tools for texturing wood is the RESTORER WR351K1, a multi-functional machine designed specifically to help you create beautiful, professional wood textures with ease.
In this tutorial, we’ll walk you through how to use the RESTORER WR351K1 to achieve different textures on new wood. Additionally, we’ll dive into the specific results of using various brushes such as the RESTORER WRTS01 twisted steel brush, WRSS01 stainless steel brush, and WRBW80 80-grit nylon brush. By the end of this guide, you’ll be equipped with the knowledge to bring any woodworking project to life using the RESTORER WR351K1.
Why Use the RESTORER WR351K1 for Texturing Wood?
The RESTORER WR351K1 is a versatile tool designed for texturing wood, which means it can be used to create patterns, distressing, or even give a weathered look to new wood. The machine comes with a range of interchangeable brushes, each offering a different texture effect. When working with new wood, the key challenge is creating depth, grain, and character. This is where the RESTORER WR351K1 shines.
The machine’s brush attachments allow you to precisely control the amount of texture you’re applying, giving you an ability to customize the finish, whether you’re after something rustic, modern, or somewhere in between. But what makes it even better is the power it offers — all while making the texturing process easier and faster than ever before.
Step 1: Preparing the Wood
Before diving into the actual texturing, it’s important to properly prepare the wood. Start by sanding down any rough patches, and ensure the surface is smooth to the touch. This will allow the RESTORER WR351K1 to work more effectively, especially if you’re looking to add subtle textures or more defined grain patterns.
Here’s how you can prepare your wood for texturing:
- Sand the Wood: Use a standard sander to smooth out the surface of the wood. The smoother the surface, the more even your texturing will look.
- Clean the Surface: Wipe away any dust or debris from the surface using a clean cloth. This will ensure that the texturing process goes smoothly without obstructions.
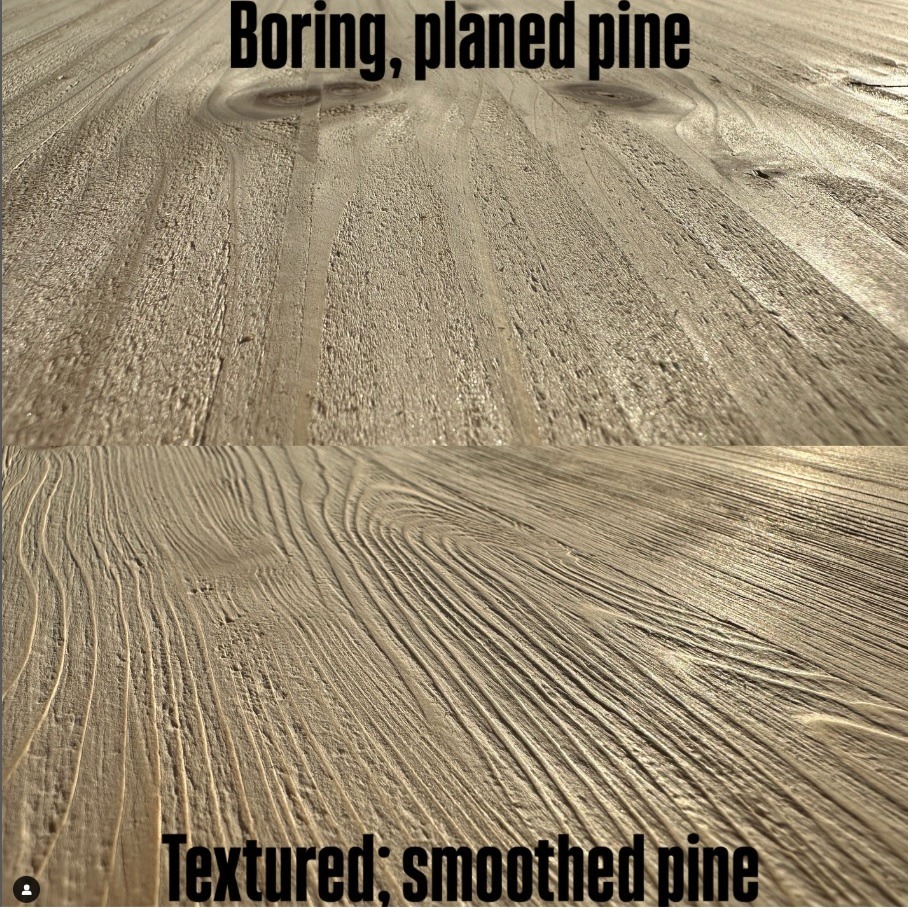
- Choose the Right Wood: Softwoods like pine or cedar work well for texturing, as the wood fibers are easier to manipulate. However, hardwoods can also be textured, though they may require slightly more effort.
Step 2: Attaching the Brush to the RESTORER WR351K1
The RESTORER WR351K1 is designed for easy brush changes, so you can switch between different brush types depending on the texture you want to achieve. Let’s take a look at the three key brushes included with the tool and how they impact the wood texturing process.
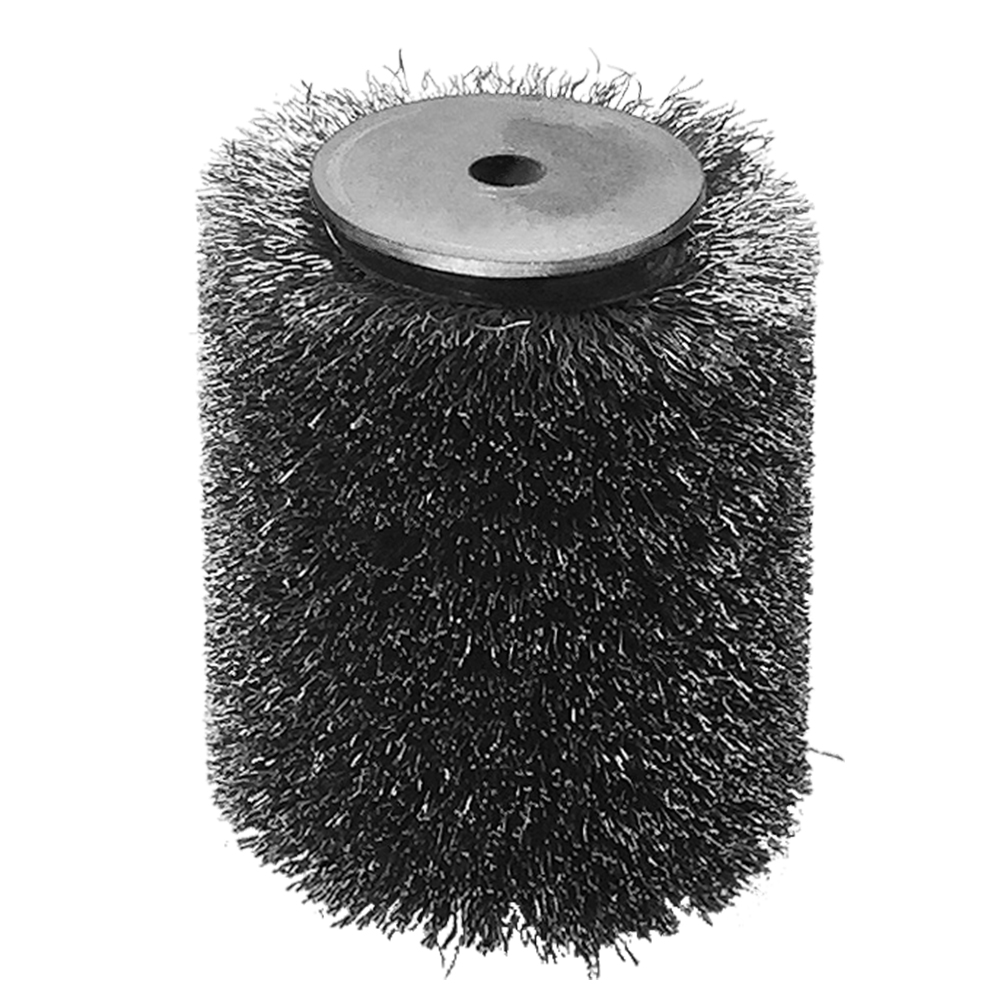
1. RESTORER WRTS01 Twisted Steel Brush
The RESTORER WRTS01 Twisted Steel Brush is a popular choice when you’re looking to create deep, dramatic textures on wood. It is made of steel wires that are twisted together, which results in a highly effective and aggressive texturing pattern.
Results:
- Heavy Texture: The twisted steel brush excels in creating bold, dramatic textures that look aged or weathered. It’s perfect for rustic, barnwood-style finishes or when you need to create deep, visible grain lines.
- Distressed Appearance: This brush is excellent for giving new wood an “old wood” feel, perfect for farmhouse-style furniture or reclaimed wood projects.
- Rough Finish: If you’re looking for a more rugged, distressed surface, this brush provides a strong and raw finish.
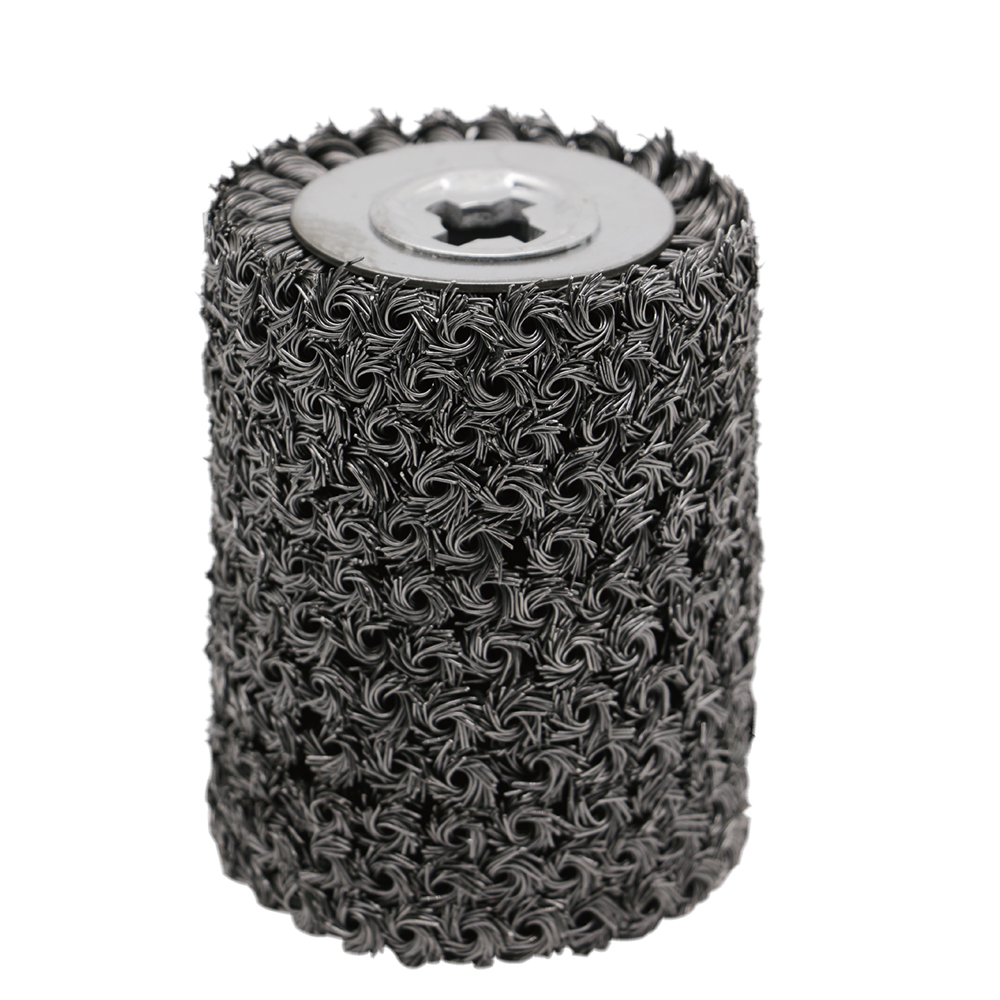
2. RESTORER WRSS01 Stainless Steel Brush
The RESTORER WRSS01 Stainless Steel Brush is made from stainless steel wires, offering a slightly more refined texture than the twisted steel brush. It’s an ideal choice when you want to add a softer texture to your wood but still create a significant grain pattern.
Results:
- Medium Texture: The stainless-steel brush produces a medium texture that’s less aggressive than the twisted steel brush, providing a smooth yet detailed grain effect.
- Clean Finish: This brush leaves a cleaner finish, with less depth and fewer abrasions compared to the twisted steel version. It’s perfect for those looking to create texture while maintaining some smoothness in the wood.
- Less Distressed Look: If you’re going for a natural look without too much weathering, this brush provides a more controlled and even texture.
3. RESTORER WRBW80 80-Grit Nylon Brush
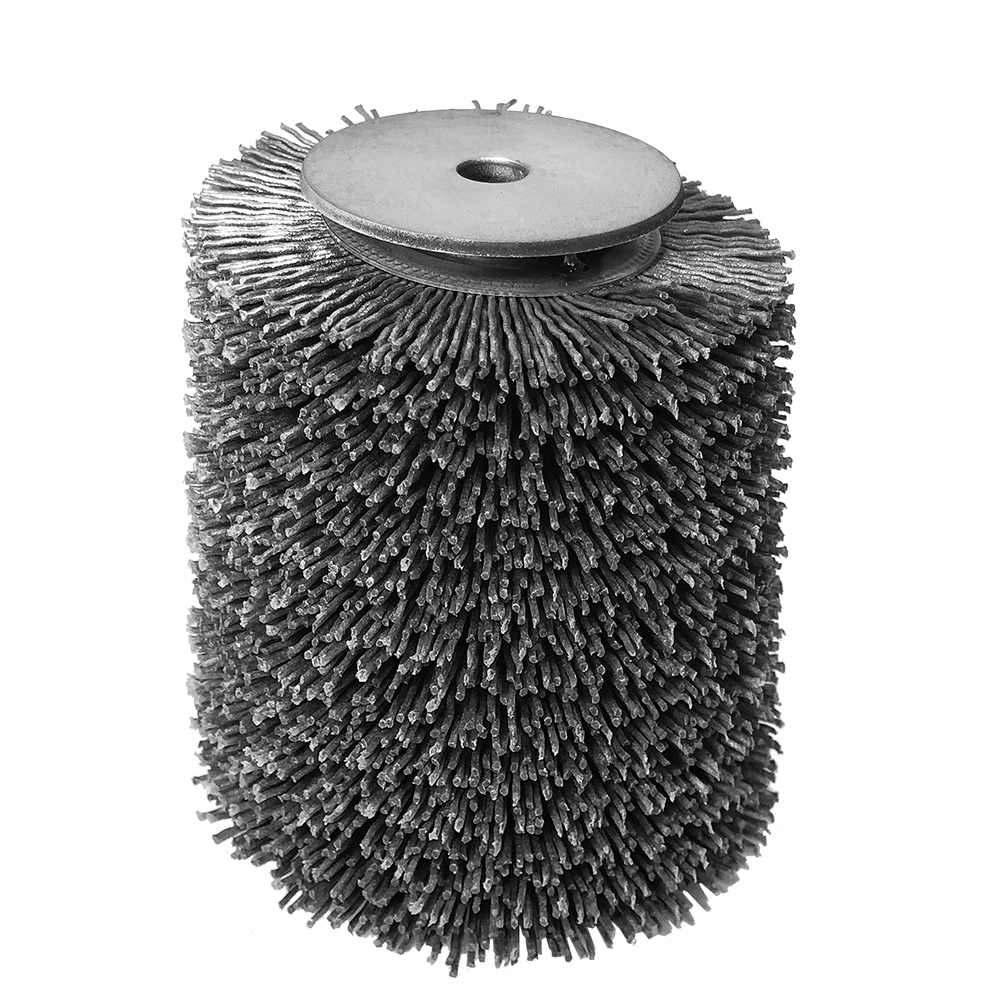
The RESTORER WRBW80 80-grit Nylon Brush is a nylon-bristled brush that features an 80-grit abrasive material. This brush is designed for less aggressive texturing but can still achieve beautiful results when used appropriately. It is particularly effective for adding subtle textures or for smoothing out areas that might have been over-textured with the steel brushes.
Results:
- Fine Texture: The 80-grit nylon brush produces a fine texture, ideal for creating a smooth, almost brushed effect on wood. It is perfect for more delicate projects where you want to add texture but keep it subtle.
- Controlled Finish: The nylon brush offers the most controlled and refined texture. It is an excellent option for texturing wood without disturbing the grain too much.
- Ideal for Refining: This brush is perfect for fine-tuning the texture after using a more aggressive brush, or for softening the finish to make the wood feel polished and elegant.
Step 3: Texturing the Wood
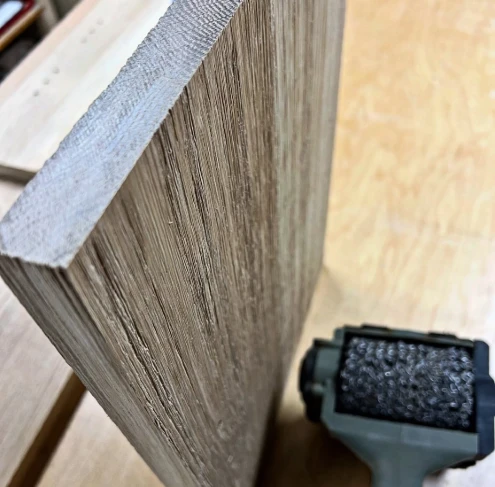
Now that you have your brush attached, it’s time to start texturing your wood. The RESTORER WR351K1 is designed for ease of use, making the process quick and efficient.
- Start at One End: Begin at one end of the wood and slowly work your way to the other. This ensures you have a consistent texture throughout the entire surface.
- Keep the Tool Moving: Avoid holding the tool in one spot for too long. Allow the tool to move fluidly across the surface to prevent uneven texturing.
- Vary the Pressure: Adjust the pressure you apply as you work with the different brushes. For example, you might want to use more pressure with the twisted steel brush for deeper textures, and less pressure with the nylon brush for a lighter finish.
- Test the Effect: If you’re unsure about how aggressive the texture will be, test on a small area of the wood first. This allows you to gauge the results and make adjustments before committing to the entire surface.
Step 4: Post-Texturing Touch-Ups
After you’ve textured your wood, there may be areas that need some touch-ups. You can refine the texture by going over certain spots with a finer brush or sanding down any particularly rough areas.
- Sanding: If you feel the texture is too harsh in certain areas, lightly sand the surface to smooth it out. Use a fine-grit sandpaper to avoid removing too much of the texture.
- Finishing: Once you’re happy with the texture, apply a wood finish (oil, stain, or varnish) to protect the wood and enhance the texture further.
Step 5: Cleaning and Maintenance
After using the RESTORER WR351K1, make sure to clean the brushes thoroughly. Remove any wood debris or residue and store them in a dry, clean place. This will help prolong the life of the brushes and ensure they perform at their best for future projects.
Conclusion
Wood Texture: A Step-by-Step Guide. Using the RESTORER WR351K1 to texture wood is a highly efficient and satisfying way to create unique, professional finishes on new wood. By selecting the appropriate brush—whether it’s the aggressive twisted steel brush for deep, rugged textures, the stainless steel brush for a more refined look, or the nylon brush for subtle, controlled finishes—you can achieve the exact wood texture you’re aiming for. With a little practice and the right technique, you can elevate your woodworking projects and bring out the natural beauty of the wood with ease.
Learning these simple wood texturing techniques will not only empower you to create stunning one-of-a-kind pieces, but it will also allow you to transform any living space. Whether you’re adding a rustic touch to a modern home or creating timeless furniture for your family, the personalized textures you create will bring warmth and character into your home. These handcrafted pieces will be cherished for years, becoming family heirlooms that will be enjoyed and appreciated for generations to come.
Happy texturing!

Don’t Forget to add the tool bag before you checkout!